Making a pour over is like taking a deep breath, a little moment for yourself during a busy morning. All it requires are a few simple tools and a little patience. The end result? A delightful cup of coffee with delicate, nuanced flavors and clean mouthfeel.
What Is Pour Over Coffee?
The pour over is a great brewing method. Its secret to success lies in the grind size and the pour method. Both of which you have full control over. As you'll quickly figure out, that can be a blessing and a challenge.
So what's the difference between a pour over and a drip coffee? In reality, both rely on a similar brewing method, filtering water through grounds. While drip is automatic and lacks control and precision, the pour over specializes in these areas and is fully manual. This results in a cleaner, more delicate, and complex cup of coffee.
But don’t say we didn’t warn you. The pour over has a bit of a learning curve. It can be easy to under extract the grounds and brew a sour or acidic cup of coffee, or to over extract and brew a bitter cup.
We created this short guide to help you navigate the learning curve a little easier and make the best pour over possible.
Pour Over Coffee Brewing Equipment
To make a great pour over, all you need are five things!
For the freshest results, you’ll want to grind your coffee beans at home. We love the Baratza Encore for producing a consistent pour over grind size.
Next, you’ll need a slow pouring kettle or a gooseneck kettle. You can make pour over without this, but it helps you control the flow of the water better than other kettles.
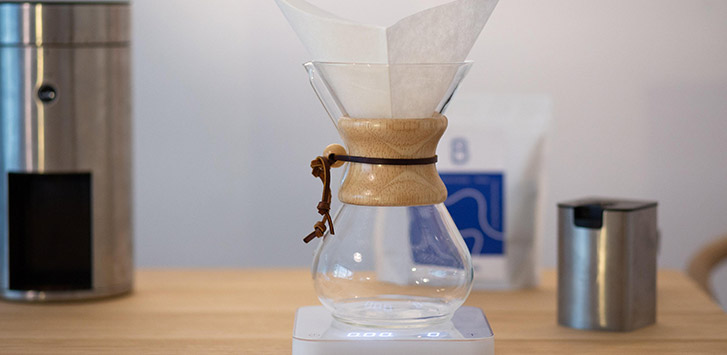
You’ll also need a gram scale to watch your water to coffee ratio.
Last, but not least, you’ll need a pour over maker. We’re partial to the Bodum Pour Over Coffee Maker. This set up has a metal pour over coffee filter that creates a full, rich body with light acidity.
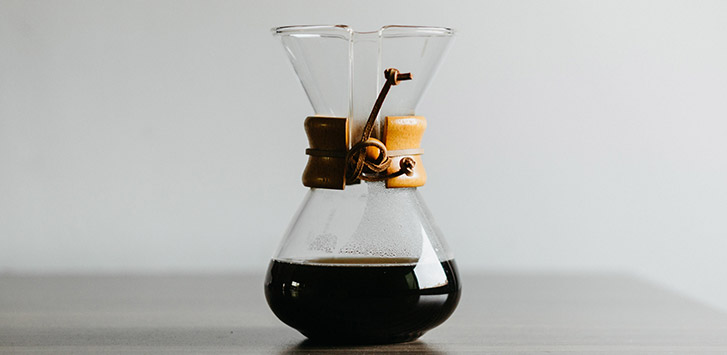
But we'd be remiss not to mention the popular Chemex. The Chemex uses paper filters, which means the water stays in contact with the grounds longer. This brewing method produces a light bodied, clean cup of coffee that’s well known and well loved.
You can also try the V60 Haro or Bee House brewer to get started.
The Best Coffee Beans For Pour Over Coffee
Pour over emphasizes light, floral notes best, which are prominent in both light and medium roasts. Dark roasts tend to burn off the lighter flavors to create that deep, rich flavor we all know. While that works well with espresso or a dark roast coffee, it doesn’t work well with a pour over.
Coffee beans from South America and Africa always do well with a light roast and boast unique floral and fruity notes. If you’re feeling adventurous, you can make your own coffee blend with different coffee beans from around the world.
The Best Pour Over Grind Size

Coffee bean grind size can make or break your cup of coffee. It’s one of the most important variables.
A good rule of thumb to remember when choosing a grind size for your brewing method is the finer the grind, the shorter the brew time. The best grind size for a pour over coffee is a medium or medium coarse grind.
The Bodum Pour Over Coffee Maker works well with a medium grind size. But medium coarse is the best Chemex grind size.
You may need to experiment some to get it right. If your coffee is thin, weak, or sour, try a finer grind size. If it’s bitter, harsh, or brothy, try a coarser grind size.
How To Make Pour Over Coffee
Finally, the reason you’re here! Let’s get into the details of how to make a pour over coffee.
- To start, put some water on to boil. It’s ready when it hits 195-205 degrees Fahrenheit.
- While your water is boiling, grind your coffee beans. You’ll want about 22-30 grams for every 350 grams of water you use. In other words, follow a 1:15 to 1:17 coffee to water ratio.
- Place your filter in your pour over maker. If your pour over uses paper filters, make sure to wet it before you put the coffee in it and then dump the water out. This will help get rid of the paper taste.
- Pour coffee grounds into the filter and tap the pour over maker lightly on the counter to make them level.
You can follow one of two pouring methods: the continuous pour and the pulse pour.
The continuous pour keeps the grounds at a consistent temperature for an even extraction. But it’s easy to over pour at the beginning and your arm can get tired.
We’d recommend the pulse pour – especially for beginners. The pulsing agitates the coffee grounds to extract the most flavor. It’s also a faster extraction and brew time.
For a pulse pour, start your pour at the outer rim of the pour over maker and move in a spiral motion toward the center. Stop your pour when all the grounds are fully saturated and you’ve added 60 grams of water. If you’re eyeballing it, stop pouring when the water raises the grounds, creating a “bloom,” about 15 seconds.
Wait about 30 seconds to begin your next pour. This time start from the center and pour outwards. Once again, stop when you’ve added 90 grams of water, about 30 seconds.
After 45 seconds, start your third pour at the center once again. Stop when you’ve added 100 grams, about 15 seconds.Wait until the water finishes filtering through the grounds and then do a final, fourth pour, adding 100 grams again, about 20 seconds.
Once the water filters through, your pour over is done. Now, all you have to do is add cream and sugar to taste or just enjoy it black.
Conclusion
Pour over is a great brewing method that gives you complete control over the entire process. While there’s a definite learning curve, the end product is worth it. If you have a chance to try it, let us know what you think!