.jpg)
You’ve loved coffee for years. It got you through your Monday 8 a.m. freshman Econ class and saved you during some stressful all-nighters. It gave you that necessary, afternoon pick-me-up at work.
Somewhere in your coffee journey you realized that you don’t need sugar and cream to make coffee taste good. Black coffee tastes great on its own.
But black coffee only tastes great when its fresh and flavorful. Now you're on a mission to get the freshest, most flavorful coffee possible.
Maybe you buy fresh beans from a local coffee shop and grind your own at home. These are great first steps to making the best coffee, but why stop there? Why not roast your own coffee at home?
Roasting coffee at home lets you experiment with different origins, blends, and roast levels. You have a chance to put on your coffee scientist hat and explore everything coffee has to offer, taking full control of your morning cup. The best part? You can drink fresh coffee whenever you want.
How to Start Roasting Coffee at Home
This journey can seem overwhelming, but it’s definitely worth it. Just take a deep breath and remember, it’s not about perfection. It’s about enjoying the process, learning more about coffee, and roasting fresh, flavorful coffee that you love.
Now, let's get started!
First you'll have to choose a roast method. The top roasting methods are roasting on the stovetop, popcorn popper, or a home coffee roasting machine. We'll go into more detail about each method in a second.
Next, set up a roasting space. You’ll want an area with good ventilation. Roasting can be a smoky experience. An area with an extractor fan, open window, or open garage is perfect.
Finally, decide what beans you want to roast and what roast level you want to take them to. Once you’ve nailed down all the details, you’re ready to roast!

Three Different Home Coffee Roasters
What’s the first step in your home roasting journey? Choosing a coffee roaster. Where you’re at in your coffee journey informs what kind of roaster you'll want. Before you decide, let’s walk through the top three methods for home coffee roasting.
Quick note: Whatever roast style you use, NEVER roast coffee without proper ventilation! It doesn’t have to be fancy, but roasting in an open air environment during temperate weather is a great solution especially if you’re planning to roast the coffee dark, which produces the most smoke. At least roast near an open window or underneath an active ventilation system like an above-range hood vent.
1. Roasting on the Stovetop
Roasting coffee in a skillet is one of the most inexpensive ways to start your coffee roasting journey. Using materials you already have at home, you’ll only need to choose which green coffee beans to buy.
While this method is incredibly fast, convenient, and inexpensive, it’s not the easiest for beginners. Finding the perfect roast temperature and getting a consistent roast will take some trial and error, but experimenting is part of the journey.
Most importantly, remember to agitate the beans throughout the whole process, stirring consistently to get an even roast. Too little agitation, and the beans will scorch; too much agitation and you’ll spill the beans!
You could also use a stovetop popcorn popper, which uses a hand crank to agitate the coffee and does a good job getting consistent results
2. Roasting in an Electric Popcorn Popper
A tried-and-true method for most beginners, the electric popcorn popper is simple, easy-to-use, and can get you an even roast. These devices are simple – just a fan and a heating element – and use convection to achieve a quick and even roast. It’s important to note that because popcorn poppers weren’t designed to roast coffee beans, they leave a lot to be desired in terms of control and switching up roast profiles. Also, they may not last as long as machines designed to handle the high heat and 6-10 minute roast times required to roast coffee. But if you’re just getting into home roasting, the popcorn popper is a great place to start!
3. Roasting in a Home Coffee Roaster
If you’re ready to jump into coffee roasting head first, invest in a beginner home coffee roaster. These will give you the best control over the roasting process, better access to the sight-sound-smell cues that’ll help you learn the roast process, and most have manual or automatic options so you can get started roasting excellent coffee out of the box!
Built for roasting coffee beans, these home roasters are long lasting, simple to use, and a great investment, but only if you’re ready for that next stage of roasting. Some great home coffee roasters to choose from are the Fresh Roast SR540, Fresh Roast SR800, and Behmor 2000AB Plus.
Basic Tips for Home Roasting
Now that you've chosen how to roast your coffee beans, let's dive into some basic tips to get you roasting!
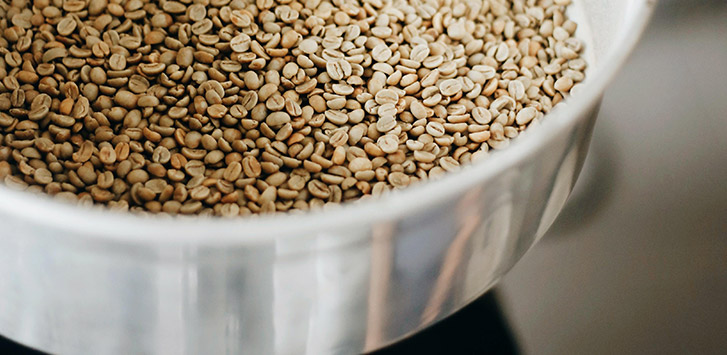
Choosing the Right Green Coffee Beans
For starters, your unroasted coffee beans can be stored for up to a year (in proper storage containers) without going stale. Green coffee beans are entirely different than their roasted counterparts, so they can’t be ground or brewed; roasting is required for safe and tasty consumption!
Remember, you won’t get the roast perfect on your first or maybe even second try. Enjoy the process of experimentation. Explore all the different flavor profiles the beans have to offer. Take advantage of your learning curve to discover what you like.
Before you settle on just one coffee to try, choose one of our sample packs and explore coffees that the world has to offer. Feel free to reach out to our staff with any questions you may have. We’re more than happy to walk you through the different coffee beans, sample packs, roasters, and more.
Once everything is set up, you’re ready to roast!
Stages of Roasting
The first stage of roasting is called the drying or yellowing stage. This is the time when the moisture in the beans is forced to the surface and evaporates. Make sure you follow the directions specific to your roasting method and that the beans are adequately agitated throughout the entire process. This will keep them from burning and also ensure an even roast.
The second stage is called the browning stage. This is the most important stage where all the chemical reactions happen. The Maillard reaction, caramelization, and Strecker degradation all combine to create the delightful, aromatic flavor profiles that coffee fans love!
Within the first 5-7 minutes of your roast, you should hear an audible crack. This signals the beginning of “First Crack” (commonly notated “1C”), which is one of the most significant events in the roasting process. First Crack is the name for the entire stage, beginning when the first few audible “pops” are heard and continuing until the majority of the beans in the batch have cracked. Very much like popcorn, the popping usually builds to a crescendo and then fades out, at which time we would mark the end of 1C. Once First Crack begins, you’ve got a light roast (technically a very light “cinnamon roast”) on your hands!
After 1C ends, you’re in medium roast territory. Once Second Crack begins, you’re approaching a dark roast.
2nd Crack occurs after almost all the water evaporates from the bean and the CO2 which has built up in the bean creates too much pressure to handle. The sugars begin to break down, creating a more bitter, less acidic coffee. This is an important stage in the roast because it goes so quickly. Even 10 seconds too long and you can end up with a much darker roast than you hand in mind, so be warned!
(Want to learn more about each roast type? Check out our light roast guide, medium roast guide, and dark roast guide to achieve your best roast possible!)
When the beans are done roasting, cool them down as quickly as possible. Coffee roasting machines usually have a built in cooling solution, but many coffee roasters will transfer their roasting beans into a metal colander or onto a cookie sheet and stir them around to dissipate the heat. We also offer a external cooling tray for this purpose, which can cool a batch of up to 300g of roasted coffee in under a minute!
Before you grind and enjoy your roast, let it de-gas for at least 12 hours (although waiting at least a few days will yield better results!) You can allow the beans to degas in the open air, or in a container with a one-way off-gassing valve. Most coffee storage containers and bag come equipped with a valve for this purpose!
Conclusion
Roasting coffee at home is a great hobby. But once you taste your first home roast, you’ll never be able to go back to store bought beans. Don’t say we didn’t warn you!
If your first roast or second roast or even third roast doesn't go the way you want, don't be discouraged. Roasting is a journey. The further along you go, the more you’ll realize you have to learn. But that’s the fun part!
Stay consistent so you can learn the tricks of the trade and always be ready to learn, improve, and explore everything coffee has to offer.